NEW BUILDS

Over 20 plus Years in the trade

We have carried out our share of new builds, whether a client has an idea on a floor plan, no floor plan at all or has plans ready to go, we are always willing to help out and use our experience to have input where requested.

WHY US

Individual approach
to every customer.

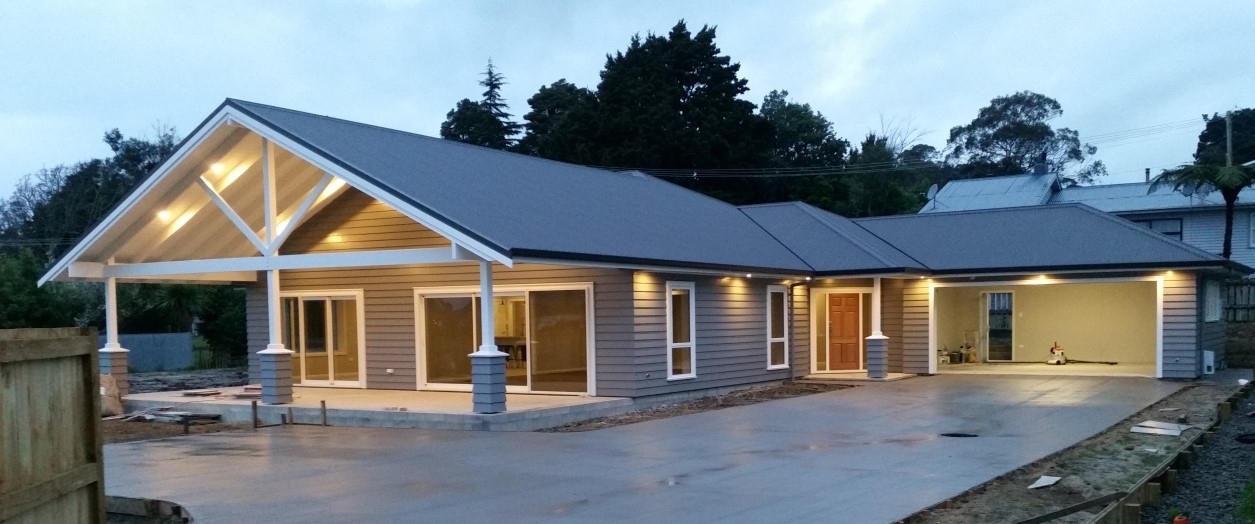
All sections, homes and budgets are different. We endeavor to put the hard work in before the building process starts. This allows our clients can get the maximum value for their money.

Steps for a Successful Building Project

  • Step 01

    Meet Clients

    We make contact with the client to discuss their requirments and their ideas. Some clients have existing plans, while others have ideas about what they want. Some people find it hard to visualise from a plan to a finished product. At JTD Building, our job is to simplify this and explain how their ideas will become a livable space or home. Our building experience comes into its own, where clients can feel comfortable and confident with their choices.

  • Step 02

    Planning & Design

    By this stage, clients will have more clarity of what they want. We do another site visit and peg out the area and room sizes so they get a feel for the space and the layout of the land. At this stage everything is sketched out to scale, we go to our design team and they will work directly with the clients. This allows us to get the final plans ready for pricing and to be lodged with the local council. Foundation testing is done, ready for the building stage.

  • Step 03

    Pricing & Quotes

    When we have the final plans, they are sent to the quantity surveyor and subcontractors for pricing. We have suppliers that our clients can go to directly to select their fittings and fixtures and get their final costings. Once all of these quotes are sent in, we go through the pricing with the client. A contract is set up. Insurance is organised and a Masterbuild Guarantee is put in place. Then it is time to build.

  • Step 04

    Site works, set up profiles

    Our first day on site we set up profiles and get the clients in to do a final check of their layout. Site works are carried out to remove any topsoil. We get the services in the ground as soon as possible.

  • Step 05

    Footings foundations

    Depending on whether we have a solid concrete foundation, block ring foundation or pile foundation set up, this will determine if we are digging a ring foundation or pile holes. Once the footings are excavated ,the steel or piles go in as per specifications. The footings are then poured, blocks or boxing are set up to create the exterior of the building.

  • Step 06

    Slab

    Hard fill and binding sand are next to go in, with a damp proof moisture barrier between concrete and hardfill. The majority of our jobs have had insulation put in to the slab. Our main layer of steel mesh is put in at this stage ready to pour concrete. After the council inspection, the concrete is placed and finished, after 48 hrs the slab is cut to reduce cracking in the concrete.

  • Step 07

    Framing

    We give the slab a week to cure.  The pre made frames arrive, constructed from J-frame or laser frame to suit the conditions. We stand, plumb and brace all frames. We go through framing at this stage with the clients to confirm they are happy with the layout. We then fix our rigid air barrier to keep the frames straight and well braced. Our scaffold is set up next, we start work on the trusses, after trusses are set up we fix purlins, frame up soffits, fix our fascia and we are ready for the roofer.

  • Step 08

    Cladding

    The advantage a rigid air barrier pre-cladding is that electrician and plumber do their pre-line work,  so once we finish the exterior there are no hold ups on the lining stage. Cavity batten is fitted if we are using it, then the cladding system is carried out to specification. Window and door joinery is fitted prior or post cladding depending on the cladding product, then the exterior is ready for the painter.

  • Step 09

    Interior linings

    Before any linings are fitted the exterior envelope of the home is insulated, this includes the garage. We use ply cladding in garages because it is the most durable lining. We use plasterboard 13mm on ceilings and 10mm  plasterboard on walls. We use Villa board in the tiled areas and  Aqualine in the wet areas.

  • Step 10

    Interior fittings finishing’s and doors

     Pre-hung doors are fitted. All hardware is fitted and taken off until after the painting is finished. The finishing’s are where  more care is taken to achieve a high quality finish

  • Step 11

    Gib-Stopper, Painter

    The gib stopper preps and plasters and sands, ready for the painter. Once the gib stopper has completed the interior gets painted.

  • Step 12

    Fit off

    This stage is where good subbies are essential. Everything gets fitted-off. The kitchen goes in, lights, power-points and switches are fitted. Taps are working and drainage is completed.

  • Step 13

    Quality check and flooring

    We go through and make sure everything is working, and there are no scratches or marks. The flooring installers come through to fit carpet or vinyl. Once the vinyl is down the plumber is in last to fit the toilets. The painter will come through to do any touch ups if necessary. We have a professional cleaner who cleans everything before hand-over.

  • Step 14

    Hand Over

    The council has their last check, the Code of Compliance Certificate is issued and we hand the new home to the client, with warranties, guaranties and maintenance schedule’s.

Key points to a quality stress free build

  • Locating the building on the site or section is crucial. Whether it is to capture the sun or keeping the building sheltered,  we work with clients to ensure the future use of their property is not limited.

  • Communication:  In our testimonials a key word used by our clients which is Communication. This is the biggest part of making the project stress-free for the clients, and ensuring their needs are met with a professional approach.

  • The look on a client’s face when they enter their new home for the 1st time with so much excitement and joy, its priceless!!

  • We use products and systems that are proven and trusted by the industry to meet performance criteria.

  • Finishing skills: The final touches to finish the job and using a trained eye to capture detail to get perfection.

  • Keep the job flowing, from start to go. Clients want to see progress. This is the best part about contracts and progress payments, it keeps the job moving

  • Having sub-contractors at the go needed is key to the management of the project. It is absolutely crucial  that every subbie gets in when they are needed, without slowing down the build.

  • Workforce: We have highly skilled employees who take great pride in their work and their finished product. We take on a job and treat it as our own.